Como Usar Inteligencia Artificial en Spring
 5 minuto(s)
En esta página:
Demo Github
Varias herramientas populares en el mundo están agregando soporte para inteligencia artificial
Actualmente, el framework Spring cuenta con soporte para diferentes modelos de Chat con IA como OpenAI, Azure OpenAI, HuggingFace, Bedrock, Ollama, etc.
En este tutorial aprenderás a Como Usar Inteligencia Artificial en Spring Framework, vamos con ello.
Sigue todos los pasos que te indicaré a continuación para que todo salga bien.
Creación de Proyecto
Para crear un nuevo proyecto usaré la Spring CLI, la cual me permite crear una aplicación de Spring con un solo comando.
Si no tienes instalada la Spring CLI, sigue los pasos del video Como Instalar la Spring CLI en Windows:
Si ya tienes instalada la Spring CLI, puedes ignorar el paso anterior.
Ejecutamos el siguiente comando para crear un nuevo proyecto con la Spring CLI:
|
1 2 3 4 5 6 |
spring boot new spring-ia Getting project from https://github.com/rd-1-2022/rest-service Created project in directory 'spring-ia' |
Luego de ejecutar el comando anterior se nos ha creado nuestro proyecto en un directorio que contiene en su interior un conjunto de directorios y archivos indispensables para que el proyecto funcione correctamente:
|
1 2 3 4 5 6 7 8 9 10 11 |
/spring-ia ├── /.mvn ├── /src ├── /target ├── .gitignore ├── HELP.md ├── mvnw ├── mvnw.cmd ├── porn.xml |
Pasemos a integrar inteligencia artificial en Spring Framework.
Usando Inteligencia Artificial en Spring
Abro el archivo llamado SpringIaApplication.java que se encuentra en src > main > java > com > example > springia > SpringIaApplication.java:
|
1 2 3 4 5 6 7 8 9 10 11 12 13 14 15 16 17 |
/aplicacionbasica ├── /.mvn ├── /src ├── /main ├── /java ├── /com ├── /example ├── /springia ├── SpringIaApplication.java // Abre este Archivo ├── /target ├── .gitignore ├── HELP.md ├── mvnw ├── mvnw.cmd ├── porn.xml |
Dentro del archivo SpringIaApplication.java agregamos lo siguiente (He colocado comentarios para explicar que hace cada línea o bloque de código):
|
1 2 3 4 5 6 7 8 9 10 11 12 13 14 15 16 17 18 19 20 21 22 23 24 25 26 27 28 29 30 31 32 33 34 35 36 37 38 39 40 41 42 43 44 45 46 47 48 49 50 51 52 53 54 |
package com.example.springia; // Utilidades para trabajar con Inteligencia Artificial en Spring import org.springframework.ai.chat.ChatClient; import org.springframework.ai.chat.StreamingChatClient; // Utilidades necesarias import org.springframework.beans.factory.annotation.Autowired; import org.springframework.boot.SpringApplication; import org.springframework.boot.autoconfigure.SpringBootApplication; import org.springframework.web.bind.annotation.GetMapping; import org.springframework.web.bind.annotation.RequestParam; import org.springframework.web.bind.annotation.RestController; import java.util.Map; @SpringBootApplication @RestController public class SpringIaApplication { // Usamos la interface chatClient para conversar con la Inteligencia Artificial private final ChatClient chatClient; // Clase principal de Spring public static void main(String[] args) { SpringApplication.run(SpringIaApplication.class, args); } // Ruta principal (Opcional) @GetMapping("/") public String hello(@RequestParam(value = "name", defaultValue = "de la Programación") String name) { return String.format("Hola Crack %s !", name); } // Usamos la interface chatClient y StreamingChatClient para conversar con la // Inteligencia Artificial @Autowired public SpringIaApplication(ChatClient chatClient, StreamingChatClient streamingChatClient) { this.chatClient = chatClient; } // Ruta para obtener las respuestas de la Inteligencia Artificial @GetMapping("/ia") public Map generate( // Le hacemos una pregunta a la Inteligencia Artificial @RequestParam(value = "message", defaultValue = "¿Donde queda Mali?") String message) { // Obtenemos la respuesta de la Inteligencia Artificial return Map.of("generation", chatClient.call(message)); } } |
Abrimos el archivo pom.xml y agregamos la siguiente dependencia:
|
1 2 3 4 5 6 7 8 |
<!-- Soporte para usar Open AI en Spring Framework --> <dependency> <groupId>org.springframework.ai</groupId> <artifactId>spring-ai-openai-spring-boot-starter</artifactId> <version>0.8.0-SNAPSHOT</version> </dependency> |
Asimismo dentro del archivo pom.xml agregamos estos 2 repositorios:
|
1 2 3 4 5 6 7 8 9 10 11 12 13 14 15 16 17 18 19 20 21 |
<!-- Repositorios necesarios para trabajar con IA en Spring Framework --> <repositories> <repository> <id>spring-milestones</id> <name>Spring Milestones</name> <url>https://repo.spring.io/milestone</url> <snapshots> <enabled>false</enabled> </snapshots> </repository> <repository> <id>spring-snapshots</id> <name>Spring Snapshots</name> <url>https://repo.spring.io/snapshot</url> <releases> <enabled>false</enabled> </releases> </repository> </repositories> |
Recuerda que al inicio de este tutorial, he colocado un enlace al repositorio GitHub de este proyecto y una Demo para que veas el proyecto en acción.
En el repositorio de GitHub encontrarás todo el código del proyecto.
Por último abre el archivo application.properties y agrega los siguientes valores:
|
1 2 3 4 5 |
spring.ai.openai.api-key=TU-API-KEY-DE-OPEN-AI spring.ai.openai.chat.options.model=gpt-3.5-turbo-0613 spring.ai.openai.chat.options.temperature=0.7 |
Ejecutamos el proyecto mediante el siguiente comando:
|
1 2 3 4 5 6 7 8 9 10 11 12 13 14 15 16 17 18 19 20 21 22 23 24 25 26 27 28 29 30 31 32 33 34 35 36 37 38 39 40 41 42 43 44 45 46 47 48 49 50 51 52 |
./mvnw spring-boot:run [INFO] Scanning for projects... [INFO] [INFO] -----------------------< com.example:spring-ia >------------------------ [INFO] Building spring-ia 0.0.1-SNAPSHOT [INFO] from pom.xml [INFO] --------------------------------[ jar ]--------------------------------- [INFO] [INFO] >>> spring-boot:3.2.2:run (default-cli) > test-compile @ spring-ia >>> [INFO] [INFO] --- resources:3.3.1:resources (default-resources) @ spring-ia --- [INFO] Copying 1 resource from src\main\resources to target\classes [INFO] Copying 0 resource from src\main\resources to target\classes [INFO] [INFO] --- compiler:3.11.0:compile (default-compile) @ spring-ia --- [INFO] Nothing to compile - all classes are up to date [INFO] [INFO] --- resources:3.3.1:testResources (default-testResources) @ spring-ia --- [INFO] skip non existing resourceDirectory D:\xampp\htdocs\xampp\nc\tutoriales\blog\spring-ia\src\test\resources [INFO] [INFO] --- compiler:3.11.0:testCompile (default-testCompile) @ spring-ia --- [INFO] Nothing to compile - all classes are up to date [INFO] [INFO] <<< spring-boot:3.2.2:run (default-cli) < test-compile @ spring-ia <<< [INFO] [INFO] [INFO] --- spring-boot:3.2.2:run (default-cli) @ spring-ia --- [INFO] Attaching agents: [] . ____ _ __ _ _ /\\ / ___'_ __ _ _(_)_ __ __ _ \ \ \ \ ( ( )\___ | '_ | '_| | '_ \/ _` | \ \ \ \ \\/ ___)| |_)| | | | | || (_| | ) ) ) ) ' |____| .__|_| |_|_| |_\__, | / / / / =========|_|==============|___/=/_/_/_/ :: Spring Boot :: (v3.2.2) 2024-02-08T19:41:40.371-05:00 INFO 18956 --- [ restartedMain] c.example.springia.SpringIaApplication : Starting SpringIaApplication using Java 17.0.10 with PID 18956 (D:\xampp\htdocs\xampp\nc\tutoriales\blog\spring-ia\target\classes started by jrclu in D:\xampp\htdocs\xampp\nc\tutoriales\blog\spring-ia) 2024-02-08T19:41:40.375-05:00 INFO 18956 --- [ restartedMain] c.example.springia.SpringIaApplication : No active profile set, falling back to 1 default profile: "default" 2024-02-08T19:41:40.578-05:00 INFO 18956 --- [ restartedMain] .e.DevToolsPropertyDefaultsPostProcessor : Devtools property defaults active! Set 'spring.devtools.add-properties' to 'false' to disable 2024-02-08T19:41:40.579-05:00 INFO 18956 --- [ restartedMain] .e.DevToolsPropertyDefaultsPostProcessor : For additional web related logging consider setting the 'logging.level.web' property to 'DEBUG' 2024-02-08T19:41:41.335-05:00 INFO 18956 --- [ restartedMain] o.s.b.w.embedded.tomcat.TomcatWebServer : Tomcat initialized with port 8080 (http) 2024-02-08T19:41:41.345-05:00 INFO 18956 --- [ restartedMain] o.apache.catalina.core.StandardService : Starting service [Tomcat] 2024-02-08T19:41:41.346-05:00 INFO 18956 --- [ restartedMain] o.apache.catalina.core.StandardEngine : Starting Servlet engine: [Apache Tomcat/10.1.18] 2024-02-08T19:41:41.391-05:00 INFO 18956 --- [ restartedMain] o.a.c.c.C.[Tomcat].[localhost].[/] : Initializing Spring embedded WebApplicationContext 2024-02-08T19:41:41.392-05:00 INFO 18956 --- [ restartedMain] w.s.c.ServletWebServerApplicationContext : Root WebApplicationContext: initialization completed in 812 ms 2024-02-08T19:41:41.912-05:00 INFO 18956 --- [ restartedMain] o.s.b.d.a.OptionalLiveReloadServer : LiveReload server is running on port 35729 2024-02-08T19:41:41.931-05:00 INFO 18956 --- [ restartedMain] o.s.b.w.embedded.tomcat.TomcatWebServer : Tomcat started on port 8080 (http) with context path '' 2024-02-08T19:41:41.940-05:00 INFO 18956 --- [ restartedMain] c.example.springia.SpringIaApplication : Started SpringIaApplication in 1.853 seconds (process running for 2.194) |
Y si abrimos la ruta local http://localhost:8080/ia en nuestro navegador, podemos ver que la inteligencia artificial nos responde sin problemas:
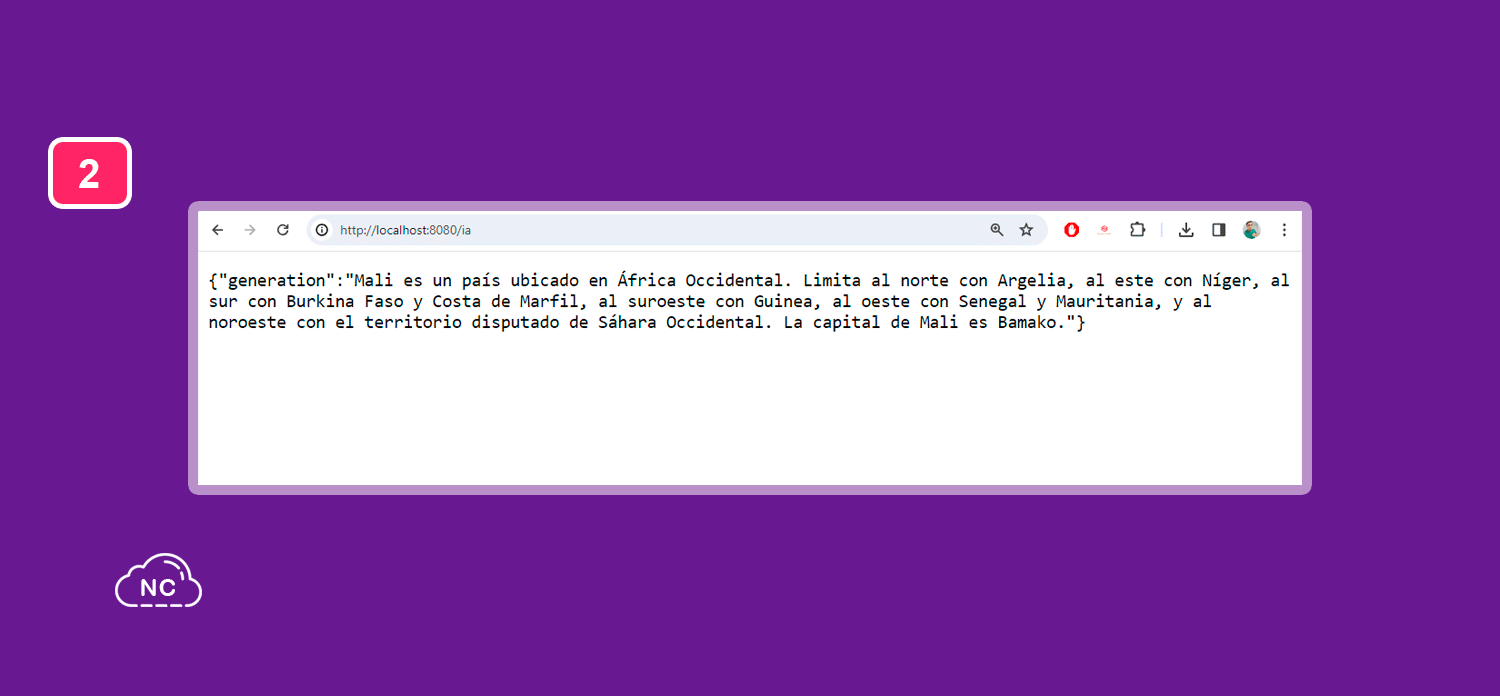
Así es como puedes usar inteligencia artificial en Spring Framework.
Conclusión
En este tutorial has aprendido a Como Usar Inteligencia Artificial en Spring.
Puedes encontrar más información sobre el uso de inteligencia artificial en la documentación oficial de Spring Framework.
Conforme practiques constantemente los pasos mencionados en este tutorial, lograrás dominar el uso de Inteligencia Artificial en Spring Framework.
Nota(s)
- No olvides que debemos usar la Tecnología para hacer cosas Buenas por el Mundo.
Síguenos en nuestras Redes Sociales para que no te pierdas nuestros próximos contenidos.
- Spring
- 08-02-2024
- 09-02-2024
- Crear un Post - Eventos Devs - Foro



 Seguimos trabajando las 24 horas del día para brindarte la mejor experiencia en la comunidad.
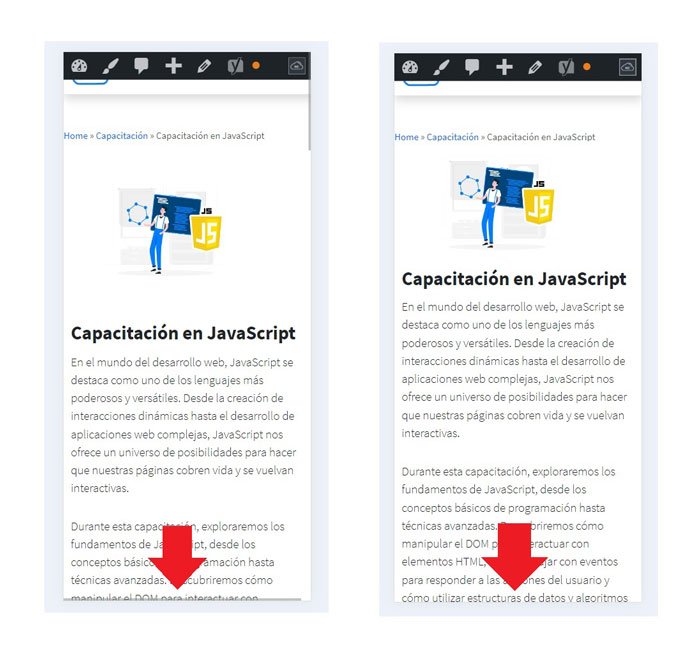 Hemos corregido el problema y ahora la web no muestra esa barra horizontal y se ve en su tamaño natural.
Seguimos trabajando las 24 horas del día, para mejorar la comunidad.
 Seguimos trabajando las 24 horas y 365 días del año para mejorar tu experiencia en la comunidad.

 Seguimos trabajando para brindarte le mejor experiencia en Nube Colectiva.

Social
Redes Sociales (Developers)
Redes Sociales (Digital)