Como Crear un Formulario en React Native y Validarlo del Lado Front-end – Parte 1
 8 minuto(s)
En esta página:
Demo
React Native nos permite crear diferentes elementos necesarios para una aplicación móvil híbrida como los formularios que permiten realizar una interacción al usuario como registrarse, iniciar sesión, almacenar pedidos y otros tipos de datos, los formularios son parte importante de una aplicación y no solo en móviles, sino también en otros entornos, en este Post vamos a crear un formulario y validarlo del lado del cliente o en la interfaz del usuario, vamos con ello.
- Parte 1
- Parte 2 (Final – Código Fuente GitHub)
Antes de continuar con este Post, te invito a leer los siguientes artículos:
- Que es React Native y tu primer Hola Mundo
- 5 Populares Aplicaciones que usan tecnología React (React Native, React JS)
- Como Crear una Aplicación Básica “Hola Mundo” con React Native 0.63.2
- Que es Android y tu Primera aplicación Hola Mundo
- Que es y Como instalar Node JS
- Puedes leer más en la categoría React Native
Asimismo te invito a escuchar el Podcast: “5 Consejos para ser un Programador más Productivo” (No son los clásicos consejos técnicos de programación, si no de rutinas y buenos hábitos cotidianos):
| Spotify: | Sound Cloud: | Apple Podcasts |
 |
 |
 |
Bien ahora continuemos con el Post: Como Crear un Formulario en React Native y Validarlo del Lado Front-end – Parte 1.
Los Pasos que realizaré a continuación y el código de React Native, pueden cambiar en futuras versiones de React Native, pero hasta la fecha de este Post estos pasos son los que se deben seguir para este tutorial en React Native 0.63.4
Yo voy a enfocarme en crear un nuevo proyecto y no en la instalación y configuración de React Native, si quieres aprender a instalar y configurar React Native te recomiendo leer el siguiente artículo llamado Como Crear una Aplicación Básica “Hola Mundo” con React Native 0.63.2:
Bien ahora pasemos a crear el proyecto para este tutorial.
Creación de Nuevo Proyecto
Voy a mi consola de comandos y ejecuto el siguiente comando para crear un nuevo proyecto en React Native, a mi proyecto le pondré de nombre appformulario.
|
1 2 3 4 5 6 7 8 9 10 11 12 13 14 15 16 17 18 19 20 21 22 23 24 25 26 27 28 29 30 31 32 33 34 35 36 37 38 39 40 41 42 43 44 45 46 |
npx react-native init appformulario This will walk you through creating a new React Native project in G:\xampp\htdocs\xampp\nc\tutoriales\appformulario "yarn" no se reconoce como un comando interno o externo, programa o archivo por lotes ejecutable. Installing react-native... Consider installing yarn to make this faster: https://yarnpkg.com npm WARN deprecated @hapi/bourne@1.3.2: This version has been deprecated and is no longer supported or maintained npm WARN deprecated @hapi/topo@3.1.6: This version has been deprecated and is no longer supported or maintained npm WARN deprecated urix@0.1.0: Please see https://github.com/lydell/urix#deprecated npm WARN deprecated resolve-url@0.2.1: https://github.com/lydell/resolve-url#deprecated npm WARN deprecated fsevents@1.2.13: fsevents 1 will break on node v14+ and could be using insecure binaries. Upgrade to fsevents 2. npm WARN deprecated @hapi/address@2.1.4: Moved to 'npm install @sideway/address' npm WARN deprecated @hapi/hoek@8.5.1: This version has been deprecated and is no longer supported or maintained npm WARN deprecated @hapi/joi@15.1.1: Switch to 'npm install joi' npm WARN deprecated core-js@2.6.12: core-js@<3 is no longer maintained and not recommended for usage due to the number of issues. Please, upgrade your dependencies to the actual version of core-js@3. added 740 packages, and audited 740 packages in 45s 14 packages are looking for funding run `npm fund` for details 7 low severity vulnerabilities ... ... ... (Continua la Instalación) ... ... Run `npm audit` for details. Run instructions for iOS: • cd "G:\xampp\htdocs\xampp\nc\tutoriales\appformulario" && npx react-native run-ios - or - • Open appformulario\ios\appformulario.xcodeproj in Xcode or run "xed -b ios" • Hit the Run button Run instructions for Android: • Have an Android emulator running (quickest way to get started), or a device connected. • cd "G:\xampp\htdocs\xampp\nc\tutoriales\appformulario" && npx react-native run-android Run instructions for Windows and macOS: • See https://aka.ms/ReactNative for the latest up-to-date instructions. |
Luego de ejecutar el comando anterior para crear un nuevo proyecto, se me ha creado un conjunto de directorios y archivos indispensables para que mi proyecto funcione correctamente.
|
1 2 3 4 5 6 7 8 9 10 11 12 13 14 15 16 17 18 19 20 21 |
/appholamundo ├── _tests_ ├── /android ├── /ios ├── /node_modules ├── .buckconfig ├── .eslintrc.js ├── .flowconfig ├── .gitattributes ├── .gitignore ├── .prettierrc.js ├── .watchmanconfig ├── App.js ├── app.json ├── babel.config.js ├── index.js ├── metro.config.js ├── package.json ├── yarn.lock |
Bien ahora voy a verificar si mi aplicación se ha creado y esta funcionando correctamente. Para esto voy abrir 2 consolas de comandos en el directorio principal de mi proyecto.
El primero comando será para iniciar el servidor de React Native, entonces ejecuto el siguiente comando.
|
1 2 3 4 5 6 7 8 9 10 11 12 13 14 15 16 17 18 19 20 21 22 23 24 25 26 27 28 29 30 31 32 |
npx react-native start ###### ###### ### #### #### ### ## ### ### ## ## #### ## ## #### ## ## ## ## ## ## ### ### ## ## ######################## ## ###### ### ### ###### ### ## ## ## ## ### ### ## ### #### ### ## ### ## #### ######## #### ## ## ### ########## ### ## ## #### ######## #### ## ### ## ### #### ### ## ### ### ## ## ## ## ### ###### ### ### ###### ## ######################## ## ## ### ### ## ## ## ## ## ## #### ## ## #### ## ## ### ### ## ### #### #### ### ###### ###### Welcome to React Native! Learn once, write anywhere |
Sin cerrar la consola anterior, ahora ejecutaré el siguiente comando en una nueva consola de comandos, con este comando iniciaré el emulador Android y compilaré la aplicación.
|
1 2 3 4 5 6 7 8 9 10 11 12 13 14 15 16 17 18 19 20 21 22 23 24 |
npx react-native run-android info Running jetifier to migrate libraries to AndroidX. You can disable it using "--no-jetifier" flag. Jetifier found 967 file(s) to forward-jetify. Using 8 workers... info JS server already running. * daemon not running; starting now at tcp:5037 * daemon started successfully info Launching emulator... info Successfully launched emulator. info Installing the app... Starting a Gradle Daemon, 1 incompatible and 1 stopped Daemons could not be reused, use --status for details ... ... ... (Continua trabajando ...) ... ... BUILD SUCCESSFUL in 55s 27 actionable tasks: 27 executed info Connecting to the development server... 8081 info Starting the app on "emulator-5554"... Starting: Intent { cmp=com.appformulario/.MainActivity } |
Se me debe de abrir el emulador Android (Recuerda tener instalado Android Studio en tu computadora) y puedo ver la aplicación que React Native creo por defecto.
Ahora borraremos el contenido de la aplicación, para agregar un formulario y posteriormente validar los campos de lado Front-End.
Creación del Formulario
Abro el archivo llamado App.js que se encuentra en el directorio principal del proyecto.
|
1 2 3 4 5 6 7 8 9 10 11 12 13 14 15 16 17 18 19 20 21 |
/appholamundo ├── _tests_ ├── /android ├── /ios ├── /node_modules ├── .buckconfig ├── .eslintrc.js ├── .flowconfig ├── .gitattributes ├── .gitignore ├── .prettierrc.js ├── .watchmanconfig ├── App.js // Abro este Archivo ├── app.json ├── babel.config.js ├── index.js ├── metro.config.js ├── package.json ├── yarn.lock |
Borro todo el contenido que hay en el archivo App.js y comienzo importando los siguientes elementos.
|
1 2 3 4 5 6 7 8 9 10 11 12 13 14 15 16 17 18 19 20 21 22 |
import React, {useState} from 'react'; import { SafeAreaView, StyleSheet, ScrollView, View, Text, StatusBar, TextInput, Button, TouchableOpacity } from 'react-native'; import { Header, LearnMoreLinks, Colors, DebugInstructions, ReloadInstructions, } from 'react-native/Libraries/NewAppScreen'; |
Paso seguido creo el siguiente formulario.
|
1 2 3 4 5 6 7 8 9 10 11 12 13 14 15 16 17 18 19 20 21 22 23 24 25 26 27 28 29 30 31 32 33 34 35 36 37 38 39 40 41 42 43 44 45 46 47 48 49 50 51 52 53 54 55 56 57 58 59 60 61 62 63 64 65 66 67 68 69 70 71 72 73 74 75 76 77 78 79 80 81 82 83 84 85 86 87 |
const App: () => React$Node = () => { const [postres, elegirPostre] = useState('Seleccionar Postre'); return ( <> <View> <Text style={styles.formulario}> Formulario de Contacto </Text> <Formik validateOnMount={true} validationSchema={loginValidationSchema} initialValues={{ nombresyapellidos: '', email:'', telefono: '', mensaje: '' }} onSubmit={values => console.log(values)} > {({ handleChange, handleBlur, handleSubmit, values, errors, touched, isValid, }) => ( <> <TextInput style={styles.nombresyapellidos} placeholder="Nombres y Apellidos" onChangeText={handleChange('nombresyapellidos')} onBlur={handleBlur('nombresyapellidos')} value={values.nombresyapellidos} keyboardType="default" /> {(errors.nombresyapellidos && touched.nombresyapellidos) && <Text style={styles.errorText}>{errors.nombresyapellidos}</Text> } <TextInput style={styles.email} placeholder="micorreo@micorreo.com" onChangeText={handleChange('email')} onBlur={handleBlur('email')} value={values.email} keyboardType="email-address" /> {(errors.email && touched.email) && <Text style={styles.errorText}>{errors.email}</Text> } <TextInput style={styles.telefono} placeholder="Nro. de Teléfono" onChangeText={handleChange('telefono')} onBlur={handleBlur('telefono')} value={values.telefono} keyboardType="number-pad" /> {(errors.telefono && touched.telefono) && <Text style={styles.errorText}>{errors.telefono}</Text> } <TextInput style={styles.mensaje} onChangeText={handleChange('mensaje')} onBlur={handleBlur('mensaje')} value={values.mensaje} keyboardType="default" multiline={true} numberOfLines={4} placeholder="Ingresa tu Mensaje" /> {(errors.mensaje && touched.mensaje) && <Text style={styles.errorText}>{errors.mensaje}</Text> } <TouchableOpacity style={styles.colorBtn} onPress={handleSubmit} > <Text style={styles.colorTxtBtn}>Aceptar</Text> </TouchableOpacity> </> )} </Formik> </View> </> ) }; |
Por último le agrego los siguientes estilos para mejorar el aspecto del formulario.
|
1 2 3 4 5 6 7 8 9 10 11 12 13 14 15 16 17 18 19 20 21 22 23 24 25 26 27 28 29 30 31 32 33 34 35 36 37 38 39 40 41 42 43 44 45 46 47 48 49 50 51 52 53 54 55 56 57 58 59 60 61 62 63 64 65 66 67 68 69 70 71 72 73 74 75 76 77 78 79 80 81 82 83 84 85 86 87 88 |
const styles = StyleSheet.create({ formulario: { color: Colors.black, fontSize: 18, marginTop: 20, fontWeight: '600', padding: 4, paddingRight: 12, textAlign: 'center', }, nombresyapellidos: { color: Colors.dark, fontSize: 18, marginTop: 20, marginLeft: 20, marginRight: 20, fontWeight: '600', paddingLeft: 20, borderWidth: 1, borderRadius: 7, borderColor: Colors.black, paddingRight: 12, }, email: { color: Colors.dark, fontSize: 18, marginTop: 20, marginLeft: 20, marginRight: 20, fontWeight: '600', paddingLeft: 20, borderWidth: 1, borderRadius: 7, borderColor: Colors.black, paddingRight: 12, }, telefono: { color: Colors.dark, fontSize: 18, marginTop: 20, marginLeft: 20, marginRight: 20, fontWeight: '600', paddingLeft: 20, borderWidth: 1, borderRadius: 7, borderColor: Colors.black, paddingRight: 12, }, mensaje: { color: Colors.dark, fontSize: 18, marginTop: 20, marginBottom: 20, marginLeft: 20, marginRight: 20, fontWeight: '600', paddingLeft: 20, borderWidth: 1, borderRadius: 7, borderColor: Colors.black, paddingRight: 12, }, colorBtn: { borderWidth: 1, borderColor: '#007BFF', backgroundColor: '#007BFF', padding: 15, marginLeft: 20, marginRight: 20, borderRadius: 7, }, colorTxtBtn: { color: '#FFFFFF', fontSize: 20, textAlign: 'center' } }); |
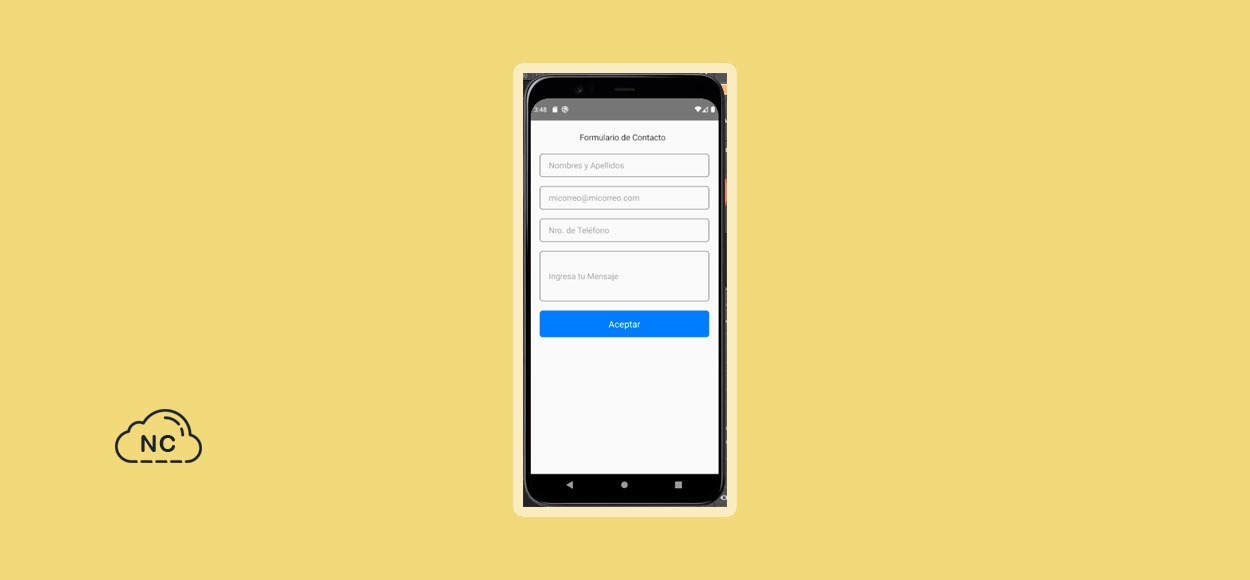
Si ejecuto la aplicación en el emulador puedo ver mi formulario sin problemas.
A continuación el código completo del archivo App.js
|
1 2 3 4 5 6 7 8 9 10 11 12 13 14 15 16 17 18 19 20 21 22 23 24 25 26 27 28 29 30 31 32 33 34 35 36 37 38 39 40 41 42 43 44 45 46 47 48 49 50 51 52 53 54 55 56 57 58 59 60 61 62 63 64 65 66 67 68 69 70 71 72 73 74 75 76 77 78 79 80 81 82 83 84 85 86 87 88 89 90 91 92 93 94 95 96 97 98 99 100 101 102 103 104 105 106 107 108 109 110 111 112 113 114 115 116 117 118 119 120 121 122 123 124 125 126 127 128 129 130 131 132 133 134 135 136 137 138 139 140 141 142 143 144 145 146 147 148 149 150 151 152 153 154 155 156 157 158 159 160 161 162 163 164 165 166 167 168 169 170 171 172 173 174 175 176 177 178 179 180 181 182 183 184 185 186 187 188 189 190 191 192 193 194 195 196 197 198 199 200 201 202 203 204 205 206 207 208 209 210 211 212 |
/** * Sample React Native App * https://github.com/facebook/react-native * * @format * @flow strict-local */ import React, {useState} from 'react'; import { SafeAreaView, StyleSheet, ScrollView, View, Text, StatusBar, TextInput, Button, TouchableOpacity } from 'react-native'; import { Header, LearnMoreLinks, Colors, DebugInstructions, ReloadInstructions, } from 'react-native/Libraries/NewAppScreen'; const App: () => React$Node = () => { const [postres, elegirPostre] = useState('Seleccionar Postre'); return ( <> <View> <Text style={styles.formulario}> Formulario de Contacto </Text> <Formik validateOnMount={true} validationSchema={loginValidationSchema} initialValues={{ nombresyapellidos: '', email:'', telefono: '', mensaje: '' }} onSubmit={values => console.log(values)} > {({ handleChange, handleBlur, handleSubmit, values, errors, touched, isValid, }) => ( <> <TextInput style={styles.nombresyapellidos} placeholder="Nombres y Apellidos" onChangeText={handleChange('nombresyapellidos')} onBlur={handleBlur('nombresyapellidos')} value={values.nombresyapellidos} keyboardType="default" /> {(errors.nombresyapellidos && touched.nombresyapellidos) && <Text style={styles.errorText}>{errors.nombresyapellidos}</Text> } <TextInput style={styles.email} placeholder="micorreo@micorreo.com" onChangeText={handleChange('email')} onBlur={handleBlur('email')} value={values.email} keyboardType="email-address" /> {(errors.email && touched.email) && <Text style={styles.errorText}>{errors.email}</Text> } <TextInput style={styles.telefono} placeholder="Nro. de Teléfono" onChangeText={handleChange('telefono')} onBlur={handleBlur('telefono')} value={values.telefono} keyboardType="number-pad" /> {(errors.telefono && touched.telefono) && <Text style={styles.errorText}>{errors.telefono}</Text> } <TextInput style={styles.mensaje} onChangeText={handleChange('mensaje')} onBlur={handleBlur('mensaje')} value={values.mensaje} keyboardType="default" multiline={true} numberOfLines={4} placeholder="Ingresa tu Mensaje" /> {(errors.mensaje && touched.mensaje) && <Text style={styles.errorText}>{errors.mensaje}</Text> } <TouchableOpacity style={styles.colorBtn} onPress={handleSubmit} > <Text style={styles.colorTxtBtn}>Aceptar</Text> </TouchableOpacity> </> )} </Formik> </View> </> ) }; const styles = StyleSheet.create({ formulario: { color: Colors.black, fontSize: 18, marginTop: 20, fontWeight: '600', padding: 4, paddingRight: 12, textAlign: 'center', }, nombresyapellidos: { color: Colors.dark, fontSize: 18, marginTop: 20, marginLeft: 20, marginRight: 20, fontWeight: '600', paddingLeft: 20, borderWidth: 1, borderRadius: 7, borderColor: Colors.black, paddingRight: 12, }, email: { color: Colors.dark, fontSize: 18, marginTop: 20, marginLeft: 20, marginRight: 20, fontWeight: '600', paddingLeft: 20, borderWidth: 1, borderRadius: 7, borderColor: Colors.black, paddingRight: 12, }, telefono: { color: Colors.dark, fontSize: 18, marginTop: 20, marginLeft: 20, marginRight: 20, fontWeight: '600', paddingLeft: 20, borderWidth: 1, borderRadius: 7, borderColor: Colors.black, paddingRight: 12, }, mensaje: { color: Colors.dark, fontSize: 18, marginTop: 20, marginBottom: 20, marginLeft: 20, marginRight: 20, fontWeight: '600', paddingLeft: 20, borderWidth: 1, borderRadius: 7, borderColor: Colors.black, paddingRight: 12, }, colorBtn: { borderWidth: 1, borderColor: '#007BFF', backgroundColor: '#007BFF', padding: 15, marginLeft: 20, marginRight: 20, borderRadius: 7, }, colorTxtBtn: { color: '#FFFFFF', fontSize: 20, textAlign: 'center' }, errorText: { fontSize: 14, color: 'red', marginBottom: 20, marginLeft: 20 } }); export default App; |
Con esto entonces tenemos creado nuestro formulario y ahora solo faltaría validar los campos.
Bueno hasta aquí terminamos esta Parte 1, en donde creamos un nuevo proyecto en React Native y diseñamos el formulario.
Ten Paciencia, lo que quiero es que entiendas todo el proceso para Crear este Proyecto y no llenarte el capitulo de mucho contenido porque te puedes marear y no tendrás un óptimo aprendizaje.
Nota (s)
- En la siguiente Parte de este tutorial vamos a validar los campos de nuestro formulario.
- El código expuesto en este capitulo del tutorial pueden cambiar, esto no depende de mi, si no de la empresa que dan soporte a React Native que suelen cambiar sus tecnologías en futuras versiones.
- No olvides que debemos usar la Tecnología para hacer cosas Buenas por el Mundo.
Síguenos en nuestras Redes Sociales para que no te pierdas nuestros próximos contenidos.
- React Native
- 21-02-2021
- 28-02-2021
- Crear un Post - Eventos Devs - Foro





 Seguimos trabajando las 24 horas del día para brindarte la mejor experiencia en la comunidad.
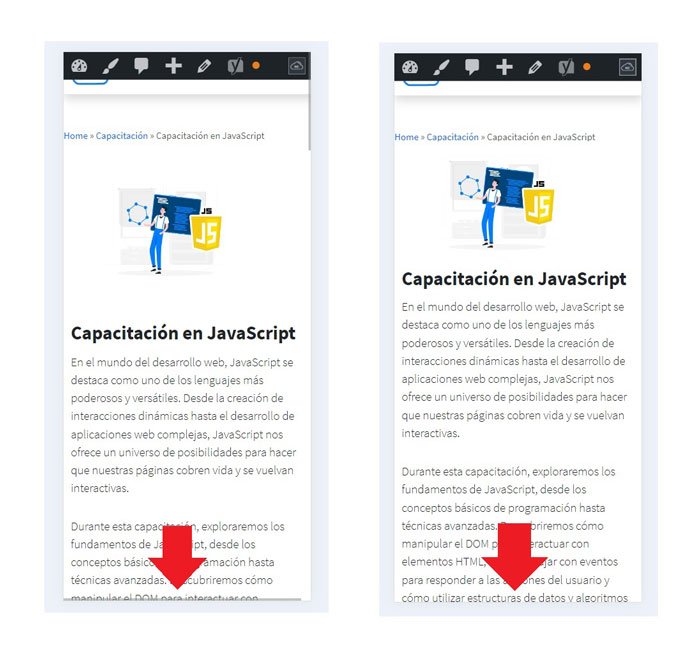 Hemos corregido el problema y ahora la web no muestra esa barra horizontal y se ve en su tamaño natural.
Seguimos trabajando las 24 horas del día, para mejorar la comunidad.
 Seguimos trabajando las 24 horas y 365 días del año para mejorar tu experiencia en la comunidad.
 Seguimos trabajando para brindarte le mejor experiencia en Nube Colectiva.

Social
Redes Sociales (Developers)
Redes Sociales (Digital)